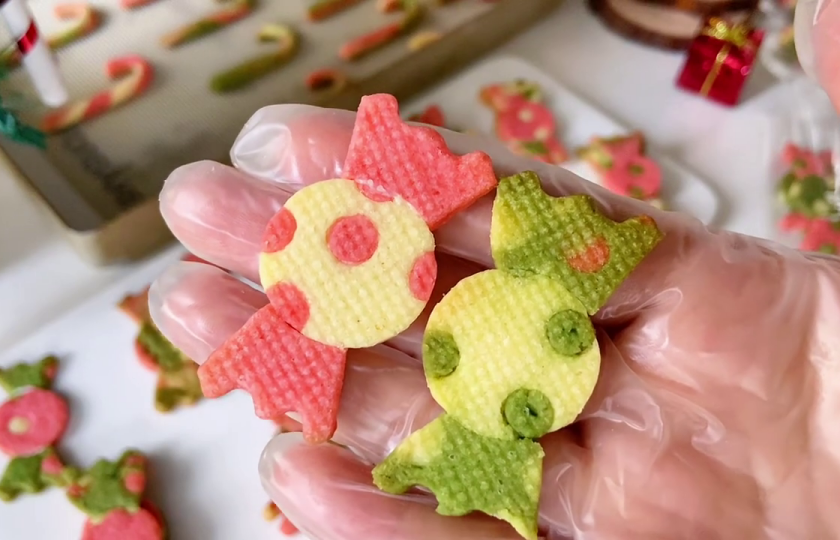
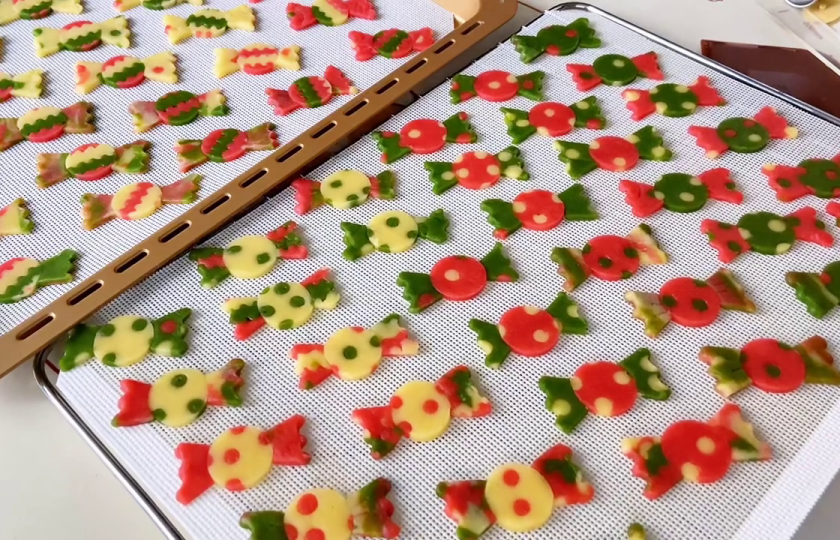
Festive Fun Elements Christmas Bon Bon Crackers

Christmas candy cookies, with their colorful hues and sweet tastes, become indispensable desserts on holiday tables. Different shapes and decorations fill these cookies with childlike fun and holiday atmosphere. Let's learn together how to make these delicious small pastries.
Required raw materials and substitutes
Main ingredients
Butter: Adds a rich and mellow milky flavor to pastries and is a key raw material for forming a delicate texture.
Low-gluten flour: Keeps the taste of pastries soft and crispy and builds the basic shape and texture of pastries.
Egg liquid: Not only helps adjust the softness and hardness of the dough but also gives pastries a unique egg fragrance flavor, making the taste more rich.
Accessories
Matcha powder: Used to make green color and add a fresh matcha flavor to pastries and bring a natural color.
Red velvet liquid: Can create a bright red color, making the appearance of pastries more attractive and also giving a unique flavor.
Seasonings
Granulated sugar: Plays an important role in increasing sweetness, neutralizing the greasiness of butter, and making the taste of pastries sweet and delicious.
Substitutes
Butter: If there is no butter, an equal amount of margarine or cream cheese can be used instead. However, margarine is different from animal butter in terms of taste and health level. Cream cheese will give the finished product a stronger cheese flavor.
Low-gluten flour: Can be replaced by mixing medium-gluten flour and corn starch in a ratio of 4:1. When operating, pay attention to the stirring method to avoid the dough becoming glutenous and affecting the taste.
Egg liquid: Can be replaced by an equal amount of milk or yogurt. However, when using milk, pay attention to the softness and hardness of the dough and adjust the amount appropriately. And the finished product will lack egg fragrance. Replacing with yogurt will give pastries a light sour taste and the flavor will change greatly.
Granulated sugar: Can be replaced by an equal amount of powdered sugar. Powdered sugar is finer and can be integrated into butter faster, but the sweetness may be slightly different. Soft white sugar can also be selected, but there will be a difference in dissolution speed during the whipping process.
Matcha powder: If there is no matcha powder, you can try using spinach juice instead for coloring. However, spinach juice will have a raw vegetable taste and affect the original flavor of pastries. Or use green food coloring, but it lacks the unique tea fragrance of matcha.
Red velvet liquid: You can choose red food coloring plus a small amount of cocoa powder to replace it. However, the unique flavor of red velvet liquid cannot be reflected. The color adjusted by simply using red food coloring will be relatively bright and single.

What tools need to be prepared
Mixing tools: An electric mixer or a manual mixer is needed to whip the mixture of butter and granulated sugar to incorporate air into the butter.
Sieve: Used to sift in low-gluten flour to make the flour more delicate, avoid lumps in the flour, and ensure the quality of the dough.
Dough operation tools: A cutting board provides a flat operation surface, which is convenient for operations such as coloring the dough, dividing equally, and rolling out thin slices. A rolling pin is used to roll the dough into a thin slice with a thickness of about 3mm and roll it flat after splicing to make the splicing part more firm.
Cutting tool: A serrated rolling knife is used to cut out thin strips on the frozen dough sheet. It can also be used to cut dough sheets of other shapes to facilitate making cookies of different shapes.
Refrigeration tool: A refrigerator. Its freezer compartment is used to freeze the dough twice. The first time is to harden the rolled three-color thin sheet to facilitate cutting and splicing. The second time is to ensure the stability of the shape of the spliced dough sheet and prepare for baking.
Adhesive tool: Egg liquid is used to dip a small amount on parts such as making decorative edges to make the parts bond better together and ensure the integrity of the cookie shape.
Baking tool: An oven needs to be preheated to 175 degrees Celsius for upper and lower heat and is used to bake cookies to make the cookies achieve the ideal color and taste. A baking tray is also needed to place the cookies for baking. It is best to line the baking tray with parchment paper to prevent the cookies from sticking.
Is there any skill in splicing patterns
Strip cutting requirements: The width of the strips should be uniform. It is recommended to be between 1-1.5 centimeters. If it is too wide, it is not easy to fit. If it is too narrow, it is easy to break. The dough should be cold and hard enough before cutting so that it can be cut neatly.
Pattern matching: The striped pattern is the simplest. First, arrange the strip-shaped dough of different colors closely and press gently. For the checkered pattern, the strip-shaped dough needs to be arranged in a horizontal and vertical crisscross. For the wavy pattern, the strip-shaped dough can be gently bent and then spliced.
Splicing points: The joint of the dough should be pressed gently. You can dip a little egg liquid to help bond. After splicing, press lightly with a rolling pin. Note that the force should be uniform. After each pattern is spliced, put it in the refrigerator for a few minutes before continuing the operation.
Temperature control: If the dough is too soft, it will affect the splicing effect. If the dough is found to be soft during operation, it should be put in the refrigerator immediately. The entire process should keep the dough at a low temperature so that the finished product will be clear and beautiful.
Matters needing attention
Raw material preparation: The softening of butter should be just right. If it is too hard, it is not easy to whip. If it is too soft, the dough will be too soft. Evenly mix granulated sugar into butter. Egg liquid must be added in small amounts several times to prevent oil and water from separating. Sift low-gluten flour to avoid lumps and make the dough texture delicate.
Dough preparation: When coloring, slowly add colorants and knead while adding to accurately divide the dough equally. The thickness of rolling out the slices is about 3 millimeters. Uneven thickness can easily lead to some parts being burnt and some not cooked during baking.
Freezing treatment: The two freezing times need to be accurately controlled. If the time is short, the dough sheet is soft and difficult to operate. If the time is long, the dough sheet is hard and easy to crack or take too much time.
Shape making: Splice quickly to prevent the dough sheet from becoming soft. Gently roll to make the patterns blend. Dip an appropriate amount of egg liquid on the decorative edges. Too little will not stick firmly. Too much will affect the taste and appearance.
Baking step: Preheat the oven to 175 degrees in advance and bake for 10 - 12 minutes. Observe the color closely during this period. If the time is too long, the cookies will be dry and hard. If the time is too short, the inside will not be cooked.
INGREDIENTS
Main Ingredients
-
·100g butter
-
·200g low-gluten flour
-
·40g egg liquid
Additional Ingredients
-
·10g matcha powder
-
·10g red velvet liquid
Seasonings
-
·40g granulated sugar
COOKING STEP
Step 1
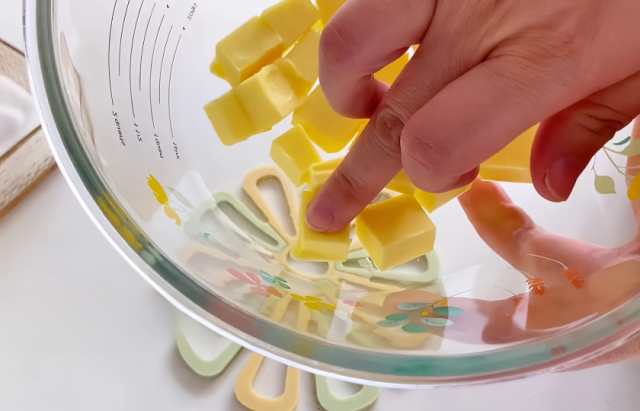
Soften butter: Take 100 grams of butter and place it at room temperature to soften it until it can be gently pressed to form a small dent, which is convenient for subsequent operations.

Step 2
Add granulated sugar and stir: After the butter is softened, pour 40 grams of granulated sugar into the butter and use a spatula to gently stir to make the granulated sugar and butter initially mix evenly and avoid lumps of granulated sugar.

Step 3
Whip butter: Then, use an electric mixer or a manual mixer to whip the mixture of butter and granulated sugar. Continuously stir until its volume significantly expands and the color turns white, allowing air to fully incorporate into the butter and laying the foundation for the fluffy texture of pastries.

Step 4
Add egg liquid in several times: Divide 40 grams of egg liquid into several times and add it to the whipped butter. After adding a small amount of egg liquid each time, use a mixer to carefully stir to ensure that the egg liquid is completely absorbed by the butter before adding the next batch of egg liquid to prevent oil and water separation and ensure that the dough texture is uniform.

Step 5
Sift in low-gluten flour and mix evenly and knead into a ball: After sifting 200 grams of low-gluten flour, slowly add it to the butter and egg liquid mixture. Then use a spatula to slowly mix the flour and the mixture by stirring and pressing. Until a dough is formed. During the process, be careful not to over-stir to prevent the dough from becoming glutenous. Finally, knead the dough into a ball.

Step 6
Color the dough and divide it equally: Divide the dough into three equal parts. One part remains in its original color. Add an appropriate amount of matcha powder to one part and knead it evenly to make it show a fresh green color. Add an appropriate amount of red velvet liquid to the other part and knead it until it turns bright red. Thus obtaining yellow, green, and red doughs of three colors.

Step 7
Roll out thin slices: Place the three colored doughs on a cutting board respectively and roll them out into thin slices with a thickness of about 3mm using a rolling pin. Try to roll them as evenly and flatly as possible when rolling.

Step 8
Freeze the dough for the first time: Put the rolled three-color thin slices into the freezer compartment of the refrigerator and freeze until hard. Generally, it takes about 30-40 minutes to facilitate subsequent cutting and operation.

Step 9
Cut strips and splice: Take out the frozen and hardened dough sheets from the refrigerator and cut them into thin strips with a knife. Splice them by randomly matching colors according to your preference. After splicing, roll them flat gently with a rolling pin to make the joints at the splicing parts more firmly connected.

Step 10
Freeze the dough for the second time: Put the rolled and spliced dough sheet into the freezer compartment of the refrigerator again and freeze until hard. The time is about 20-30 minutes to ensure the stability of the dough sheet shape.

Step 11
Make circular patterns: For the remaining half of the dough, it can be spliced into dots. Also roll it flat with a rolling pin and then put it in the refrigerator for freezing. The freezing time refers to the previous steps.

Step 12
Make decorative edges: Leave some dough sheets to make the two edges of candies. When splicing these parts, it is best to dip a small amount of egg liquid so that the parts can bond better together and ensure the integrity of the shape.

Step 13
Bake pastries: Put the prepared pastries into an oven preheated to 175 degrees Celsius for upper and lower heat and bake for 10-12 minutes. During the baking process, pay attention to the color change on the surface of the pastries. When it presents a beautiful golden color, it can be taken out and enjoyed.

More recipes worth trying
Holiday Treats Feature Little Debbie Christmas Tree Cakes
Chocolate Oreo Mousse Recipe | Quick & Eas
Matcha Mochi With Red Bean Paste Recipe
Glossy Crystal-Coated Candied Apples
Why freeze twice
This is mainly to ensure the appearance and taste of the finished product.
The first freezing is carried out after the dough is rolled into thin slices. This can make the dough hard and easy to cut into strips, ensuring neat and beautiful cuts. At the same time, it can also prevent the dough from softening due to room temperature and affecting the subsequent splicing effect.
The second freezing is carried out after the splicing pattern is completed. This step is very crucial. Because during the splicing process, the dough will soften due to hand temperature and room temperature. If baking is carried out directly, the pattern is easy to deform or become blurred.
By freezing again, the spliced dough can be completely shaped, making the doughs of various colors closely combined and ensuring that the pattern is clear and complete after baking.
Recipe Variations
Recipe variations can make Christmas candy cookies more rich and diverse:
Adjustment of basic formula: Low-gluten flour can be replaced with medium-gluten flour, and the taste will be more resilient. The amount of sugar can also be reduced, and seasonings such as matcha powder and cocoa powder can be added to make the taste fresher. Part of the butter can be replaced with light cream, which will make the cookies more crisp and soft.
Colors and shapes: In addition to the traditional red and green color combinations, you can also choose colorful colors such as pink, purple, and blue. Patterns can be made into wavy patterns, checkered patterns, swirl patterns, etc. Adding decorations such as sugar beads and chocolate chips will make the cookies more festive.
Taste innovation: Nuts, cranberries, coconut shreds, etc. can be added to the dough to add texture levels. You can also brush a layer of egg liquid on the surface and sprinkle with cinnamon powder or powdered sugar. The baked cookies can be sandwiched with jam or cream to make sandwich cookies. When making, pay attention to using an appropriate amount of various ingredients to avoid affecting the structure of the dough.
FAQs:
First, in terms of taste. Compared with other flours such as medium-gluten and high-gluten flours, low-gluten flour has a lower gluten content. In the process of making cookies, it can make the cookies taste more crispy and softer. If high-gluten flour is used, due to the high gluten content and excessive gluten strength of the dough, the cookies will become hard and chewy, which does not meet the crispy taste requirement of this kind of cookie.
Second, in terms of shaping. The dough formed by low-gluten flour is relatively soft and is easier to operate during operations such as rolling out thin slices, cutting and splicing. It will not shrink like high-gluten flour due to strong gluten, and can maintain the shape well, making the cookie-making process more smooth.
The correct way to store is: Put the completely cooled cookies into a sealed cookie box or glass jar. It is best to put a desiccant at the bottom of the container. The storage environment should be a cool and dry place, avoiding direct sunlight and high temperature and humidity. In this way, it can be stored at room temperature for 7-10 days and still remain crispy and delicious.
Operation skills and precautions: When dividing the dough into colors, allocate the weight in advance. The kneading time for each colored dough should be the same. If the color is found to be uneven, the dough can be rolled thinly and then folded and kneaded again. When kneading, pay attention to uniform force to avoid kneading too much in some parts and too little in others.
Temperature control is crucial: Too high a dough temperature will cause pigments to precipitate. It is recommended to refrigerate for a few minutes every time after kneading for a while. Before final shaping, fully cool the dough before cutting and splicing so that the color will be more stable.
If the dough is too dry or too hard, it is easy to cause cracking. The proportion of butter and flour should be accurate when making. The dough should be kneaded fully to reach a smooth and elastic state. The temperature of the dough before splicing should not be too low. It should be warmed to a slightly soft but not sticky degree, so that it is easier to fit.
Tip: Gently press the doughs of different colors together. The force should be uniform and moderate. You can gently press the seams with your fingers or a rolling pin, but don't press too hard to avoid destroying the pattern. When splicing, pay attention to keeping a certain humidity on the surface of the dough. You can gently brush a layer of egg liquid with a brush to help bond.


