Guide: How to Make Flour Tortilla Bowls in Air Fryer

Air fryers aren't just for frying - they can create perfect tortilla bowls, making this kitchen appliance even more versatile.
Can you make flour tortilla bowls in air fryer?
Yes, it's quite easy to make flour tortilla bowls in an air fryer. My personal tests show that the shaping effect is comparable to that of an oven. I'll demonstrate with a regular tortilla that is 15 cm in diameter. Choosing the right mold is the key.
① Choose a heat - resistant mold for shaping
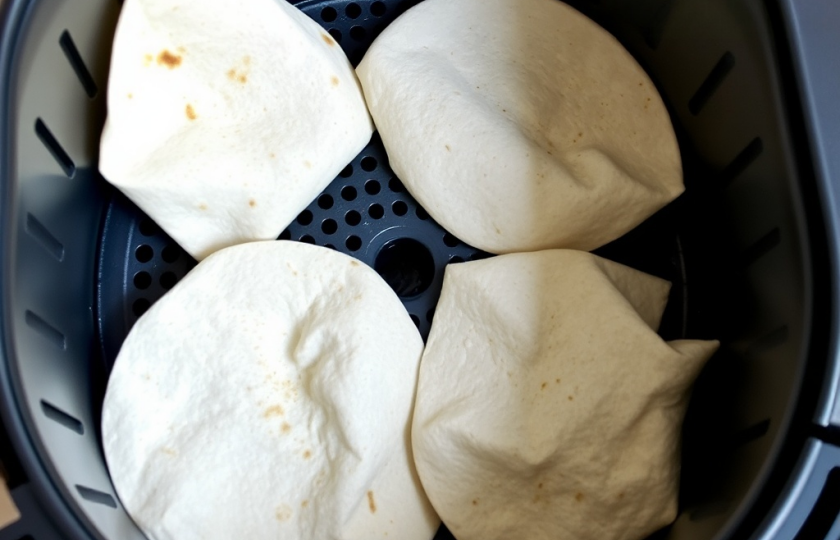
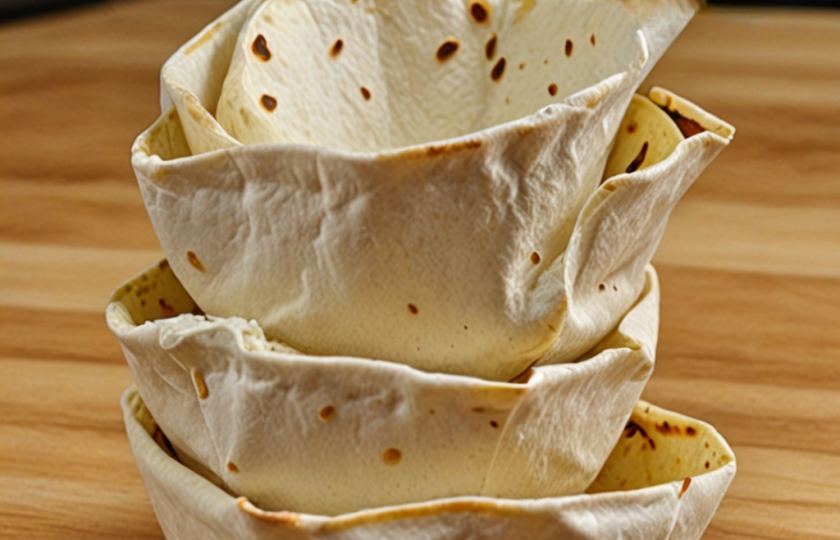
Invert a heat - resistant bowl in the air fryer basket (or shape aluminum foil into a bowl - shaped support), and brush a thin layer of oil on the surface. Let the tortilla return to room temperature and become soft, then gently place it on the mold. The edges will naturally droop to form a bowl shape.
② Set a medium temperature for quick shaping
Set the air fryer to 170 degrees and air - fry for 3 minutes. The tortilla will shrink and stick tightly to the mold. After taking it out, immediately use tongs to adjust the wrinkled parts, then put it back into the air fryer and air - fry at 160 degrees for an additional 2 minutes to ensure that the whole tortilla bowl is crispy and doesn't collapse.
③ Cooling and demolding techniques
After turning off the heat, let it sit for 1 minute before taking it out. Gently pry along the edge with a butter knife. If it sticks badly, wrap the mold with a wet cloth for 10 seconds. The principle of thermal expansion and contraction can help separate it easily.
The secret to preventing it from becoming soft again: Brush the freshly - fried tortilla bowl with a layer of melted butter while it's still hot, and let it cool on a baking rack. When pairing it with salad or thick soup, first coat the inner wall with a layer of chocolate sauce or cheese to isolate the moisture.
Do I need to spray oil on tortillas before air frying?
You actually need to spray oil on tortillas when using an air fryer, but use it moderately. My years of experience tell me that spraying oil not only makes the tortillas crispier but also prevents them from sticking to the pan.
Flat Baking
Gently spray a thin layer of oil on both sides of the tortilla, spraying a bit more around the edges. This can prevent the edges from curling up. If you don't have an oil sprayer, you can also dip a silicone brush in a little vegetable oil and gently brush it on.
Shaping into a Bowl
If you want to make tortilla bowls, be sure to grease the inner surface of the mold. It is recommended to dip a kitchen paper in vegetable oil or butter and gently wipe it. This way the finished product can be easily demolded without breaking.
Temperature Control
First, bake at 170 degrees for 3 minutes to set the shape of the tortilla, then lower the temperature to 160 degrees and bake for another 2 minutes. Keep an eye on it during this time. If you notice the edges turning white, it means you need to spray some more oil. I suggest keeping a closer watch when trying it for the first time. Once you get familiar with it, you can easily master the heat.
Tip: If you want to save oil, you can use cornstarch instead, but the texture will be a bit harder. It is more suitable for making cold food containers like salad bowls.

Can I use corn tortillas instead of flour tortillas?
You can definitely use corn tortillas as a substitute! However, you need to master the anti - cracking techniques. I've tried three methods, and now I'll share the most effective one with everyone.
Softening Treatment is Necessary:
Corn tortillas become hard after refrigeration. First, wrap them in a damp kitchen paper and heat them in the microwave on medium power for 8 seconds. Or bake them over low heat in a pan for 5 seconds on each side. They are ready when they feel slightly soft rather than crispy.
Brush Oil on Both Sides to Lock in Moisture:
Corn tortillas are relatively dry. Use a silicone brush to apply a layer of light - flavored vegetable oil (such as sunflower oil) on both sides. Apply a bit more oil around the edges to prevent curling and cracking at high temperatures.
Shape with the Help of a Mold:
Find a small heat - resistant bowl and place it upside down in the air - fryer basket. Lay the softened corn tortilla on it. Gently press along the edge of the bowl bottom with your fingers to create creases. Don't pull too hard.
Slow Baking at Low Temperature is Safer:
Set the temperature to 155°C and bake for 3 minutes first. Open the air fryer for quick shaping, then bake for another 2 - 3 minutes until the edges turn golden brown. If baked for too long, they will become as hard as biscuits.
If you find small cracks after baking, you can gently press them with your fingertips dipped in water while they are still hot to repair them. After cooling, you can fill them with guacamole or chicken salad. The best crispness can last for about half an hour!
How do I shape the tortilla bowls without breaking them?
Softening the tortilla is the first step
Refrigerated corn tortillas are prone to cracking when shaped directly. Steam them over boiling water for 10 seconds or heat them on medium power in the microwave for 8 seconds. This will make the tortilla regain some softness and toughness, and it will be less likely to break when folded.
Inverting for shaping has a higher success rate
Lay the corn tortilla over the mouth of a heat - resistant small bowl or mug and gently press it into a bowl shape. If the edges don't fit well, dip your fingers in cold water and gently wipe the creases. The moisture can temporarily increase the extensibility.
Set the shape first, then make it crispy
Bake at 160°C for 2 minutes to set the shape. Take it out, remove the mold, and then adjust the temperature to 180°C and bake for 3 minutes. This two - stage heating method can not only maintain the shape but also make the tortilla bowl evenly crispy.

What size tortillas work best for making bowls?
A diameter of 15 centimeters is the most versatile
Medium - sized corn tortillas (about 6 inches / 15 centimeters) are the easiest to shape. After folding the edges, the depth is just right, making them suitable for holding salads or thick soups. They make good use of the space in the air - fryer basket and are less likely to break due to over - stretching.
Larger sizes require adjusted techniques
For tortillas larger than 8 inches (20 centimeters), it is recommended to round the edges first. When shaping, focus on creating creases at the bottom to avoid the bottom sagging after baking. These large bowls are suitable for serving as snack trays.
Choose a thickness of about 0.5 millimeters
Tortillas that are too thin (< 0.3 millimeters) are prone to cracking after heating, while those that are too thick (> 1 millimeter) do not heat evenly. When purchasing, check the labels. "Soft taco" types are more suitable for shaping than "crunchy" ones.
How do I keep tortilla bowls crispy after making them?
Let them cool completely before storage
Don't rush to put the freshly baked tortilla bowls into bags. I usually let them sit on a baking rack for 20 minutes to allow all the heat to escape. If you stack them directly, the water vapor at the bottom will make the crispy shells soft.
Seal with desiccants
After they are completely cooled, put them into an airtight container and place a kitchen paper at the bottom to absorb moisture. Put two commercially available food desiccants in it, or use gauze to wrap two tablespoons of raw rice instead, which can effectively prevent moisture.
Reheating before eating requires attention
Don't throw away the moisture - affected tortilla bowls! Preheat the air fryer to 90 degrees and air - fry for 3 minutes, or bake them in the oven at 100 degrees with hot air for 2 minutes. This can restore about 80% of the crispness. Eat them immediately after reheating.
Brush more oil during the shaping stage
During the production process, brush a layer of melted butter on the inner side of the tortilla bowl. After cooling, it will form a waterproof oil film. Before adding food with soup, first spread a layer of chocolate sauce or peanut butter, which will have a better isolation effect.


